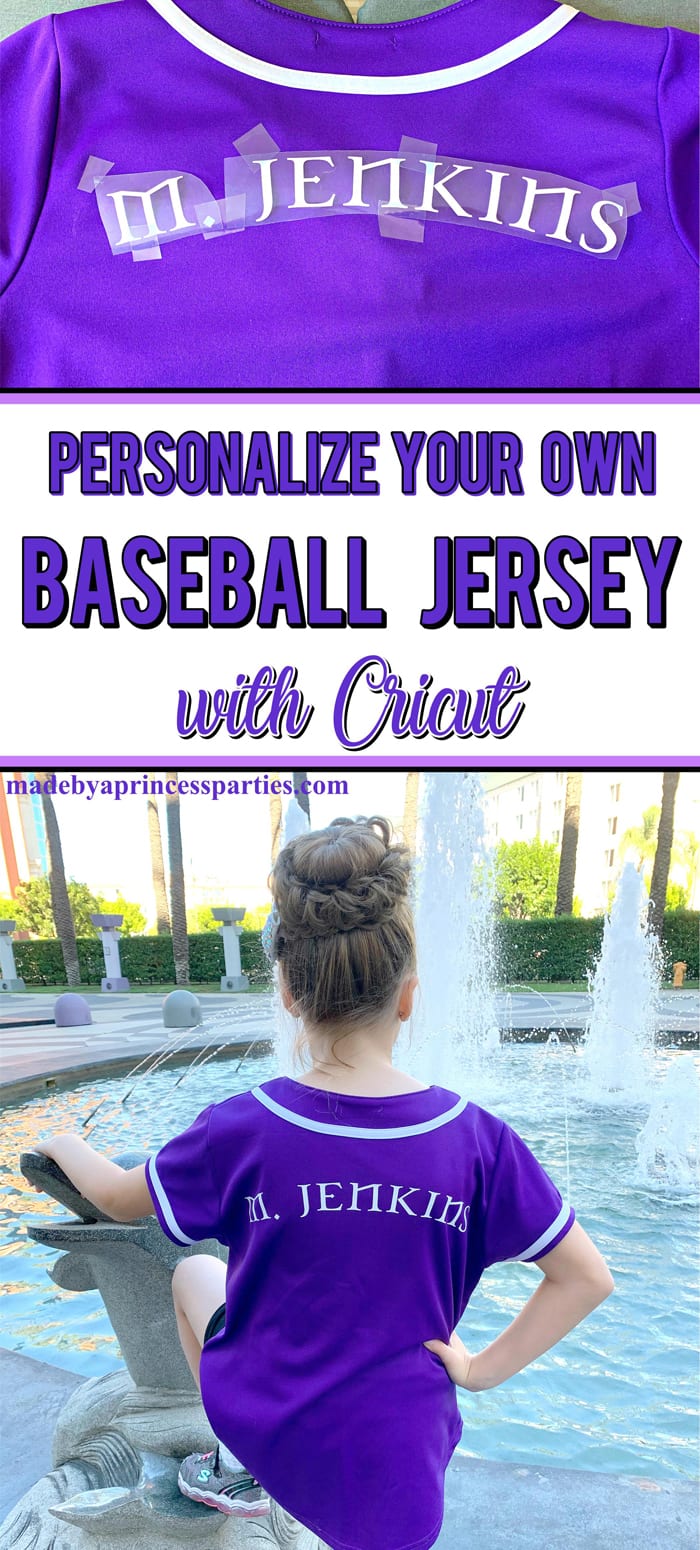
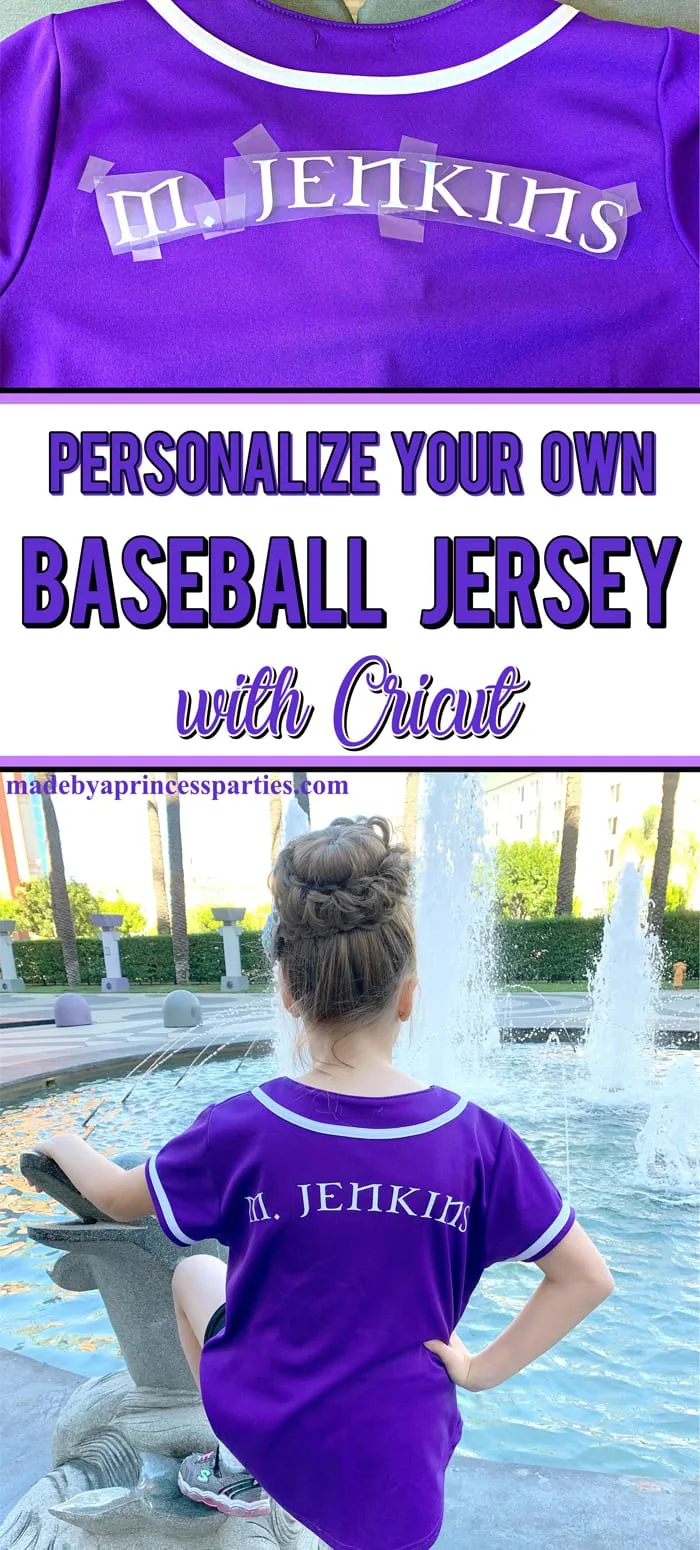
Tired of ruining your hair at dance competitions? Try a custom button up baseball jersey! When you wear a cute personalized baseball jersey you can show off your school pride and not mess up your hair at the same time!
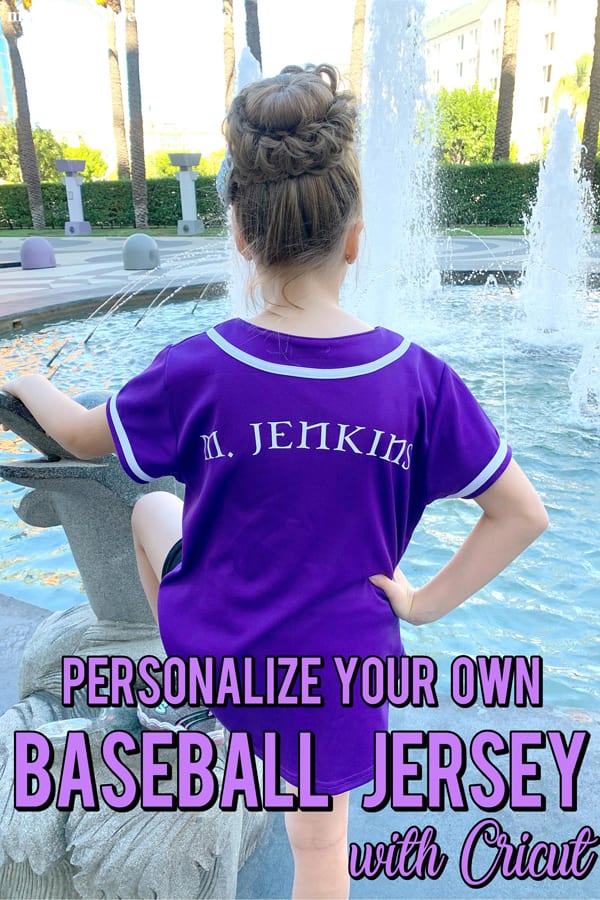

Hey Dance Moms…can I let you in on a little tip? If you’re tired of ruining your little dancer’s hair (that you spent forever doing) by pulling a t-shirt over her head, try a baseball jersey. Even better, try a Custom Button Up Baseball Jersey! It’s so easy to create your own personalized jersey perfect for dance competitions.
Custom Button Up Baseball Jersey for Dance Competitions
This is a sponsored conversation written by me on behalf of Cricut. The opinions and text are all mine.
Let’s chat about competition shall we? I am pretty new Dance Mom. My daughter has been doing Irish Dance for a little over a year and I have become a full on, all out, all in…Dance Mom. I never thought it would happen to me. What’s more…I LOVE IT! I love everything about Irish Dance and am so excited to be doing this with my daughter.
In this short time I have learned quite a bit. Don’t get me wrong there is soooo much more to learn but I am figuring it all out as we go along. With each Feis I learn more and we, my daughter and I, get better at navigating this new world filled with garment bags, makeup cases (and makeup train cases), and dance bags.
Baseball Jerseys for Irish Dance
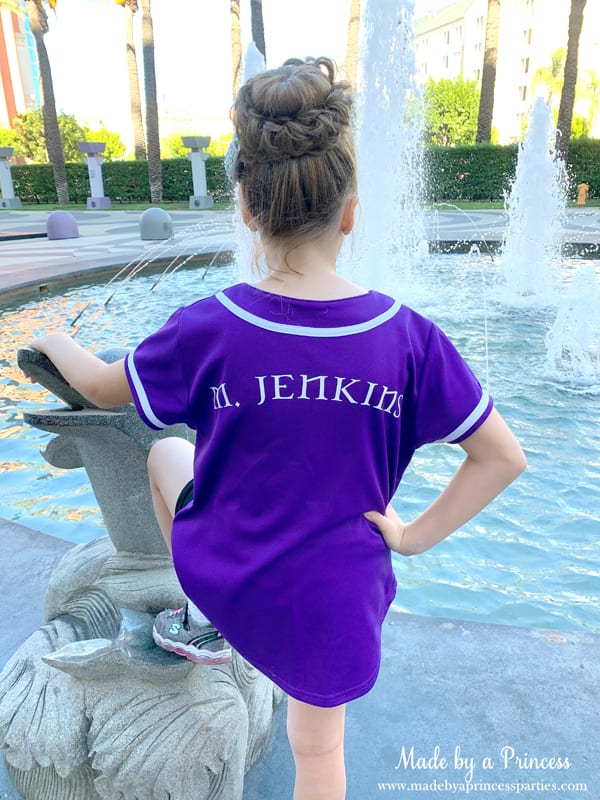
My young cousin, Maggie, has been dancing for about eight years. Thank goodness for her mom, my cousin Kristi, teaching me the ropes. One of the things I noticed Maggie had was a cute team baseball jersey. I realized that it was more functional than cute when I ruined my daughter’s hair at competition not too long ago. Know what I’m talking about fellow Dance Mom? You get the hair looking all cute with the perfect bun, combed, hairsprayed, bling bow in and you realize her short sleeve t-shirt is still on. Oh heeeelll nooooo! It was at this moment a lightbulb went off…those baseball jerseys are not just for show…they are perfect for competitions because they don’t go over your dancer’s head! Iknowright?!
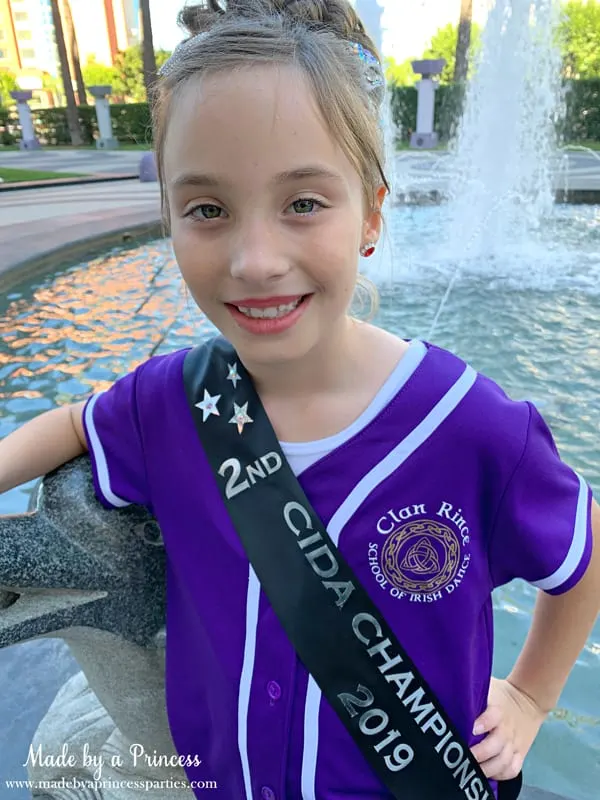
After fixing her hair and sending her off to check in for her Reel, I jumped on Amazon and ordered a youth baseball jersey. Purple is our main school color so I bought purple. She wore her new custom button up baseball jersey a few weeks ago and loved it. Eventually our school will have our own but for now, this is perfect.
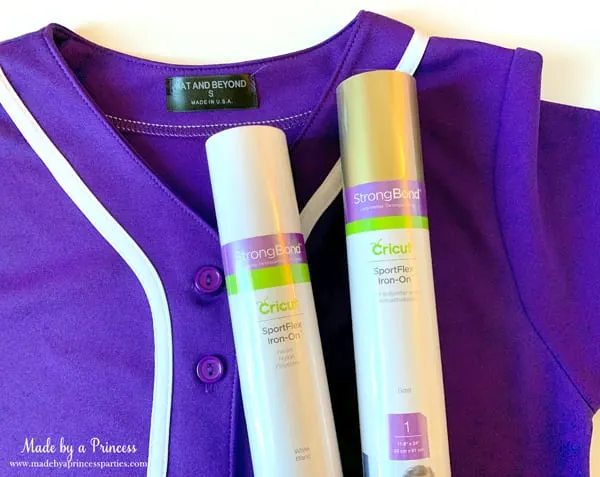
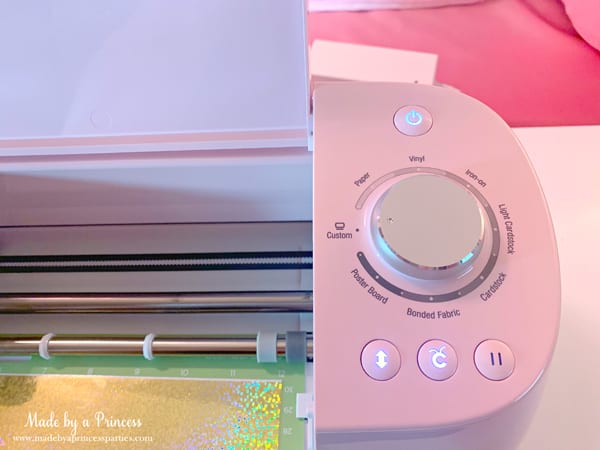
How to Customize Baseball Jerseys with Cricut Explore Air 2
This project was pretty simple using my Cricut Explore Air 2. I did, however, make some mistakes so now you don’t have to. Before you get started grab your supplies. For this project you are going to need:
- Cricut Explore Air 2
- Strongbond SportFlex Iron On Vinyl in White and Gold from Cricut
- Standard Grip Mat from Cricut
- Cricut Tools
- EasyPress 2 from Cricut
- Cricut Heat Resistant Tape
Note: SportFlex is not compatible with 100% Cotton or Cotton/Poly blends so make sure your baseball jersey is polyester.

Create Your Image in Design Space
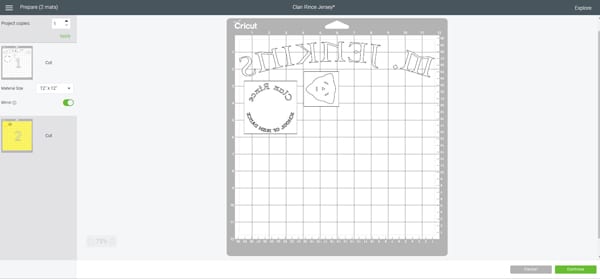
Creating a name iron on vinyl decal in Design Space is really easy. First you want to figure out how wide to make the name. This is a Youth Small Baseball Jersey so the name isn’t that long across the back of the shirt. If your name needs to be wider than allowed using a 12×12 mat I suggest using a 12×24 mat and turning the image so it cuts down instead of across.
Now that you have figured out the proper width, choose a font. I chose Celtic Garamond because that is what is used in the team logo.
Once you have chosen the font and typed the name, you can curve your text by clicking on “Curve” on the top bar.
To provide some context here are the measurements I used:
- Font: Celtic Garamond
- Width: 11.3″
- Height: 2.2″
- Curve: 27.3″
- Letter Space: .9
Once you are happy with your name don’t forget to “Weld” it otherwise the letters will cut individually. You definitely don’t want that.
Next, click, “Make It”, choose your mat size and remember to click “Mirror”.
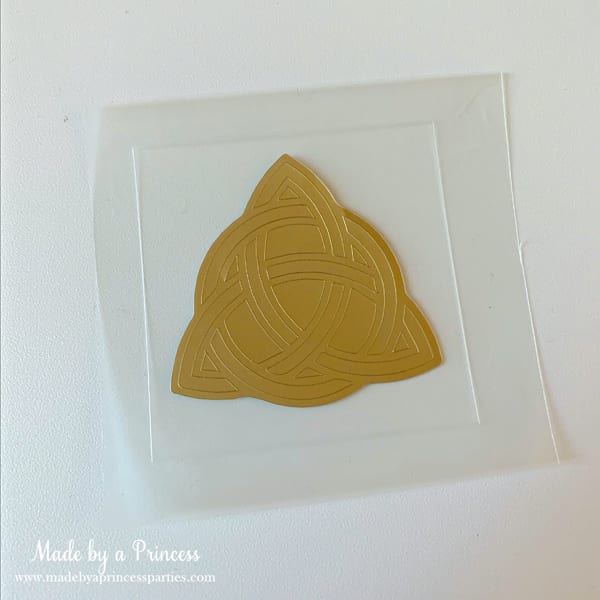
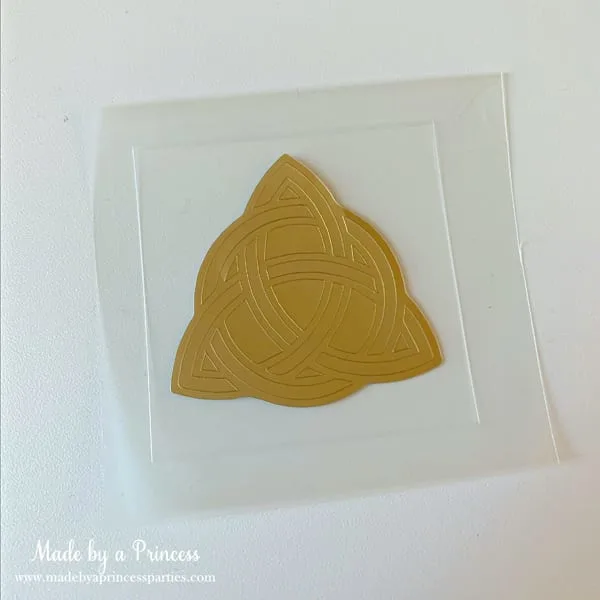
Weeding Box
If you’re wondering what those boxes are around the logo images those are called weeding boxes. They are really helpful particularly when you have multiple images cut on one sheet of vinyl. All you need to do is create a box using, “Shapes” and make it slightly larger than your image. In order for it to work it needs to be the same color as the image you are cutting. When you get to the “Prepare” screen move your box behind the image like you see below.
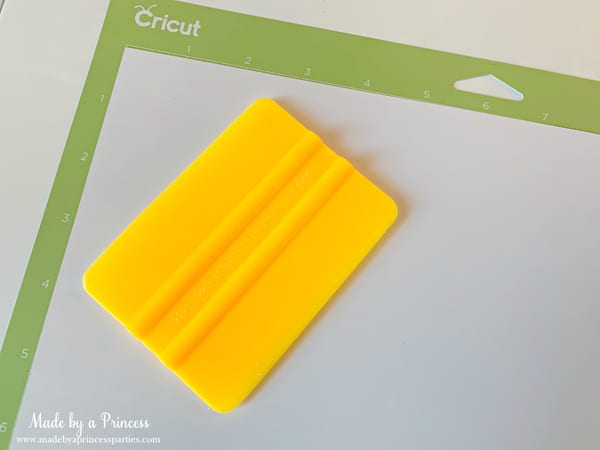
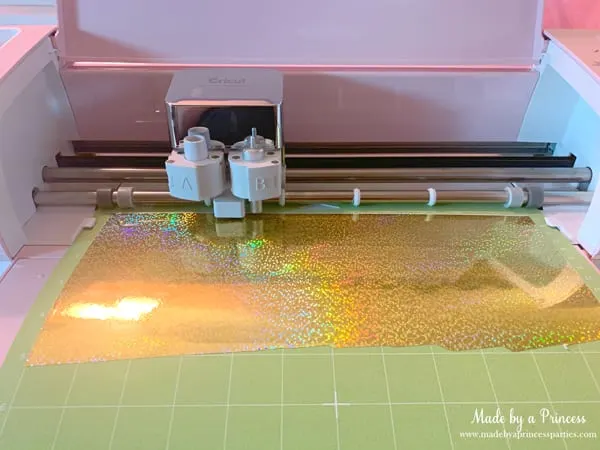
Remove Bubbles in Vinyl
Before feeding your mat into the machine, make sure you all smoothed all the bubbles out of your vinyl. Bubbles could mess up your design when the blade tries to cut over them. Take your scraper and gently push bubbles out the sides. If you can’t get them out, remove vinyl and place on the mat again.
Note: As always with iron on vinyl, the “right” side goes down on the mat leaving the adhesive side exposed.

This is what a weeding box looks like after cutting. SportFlex pulls off really easily leaving a nice clean design behind.

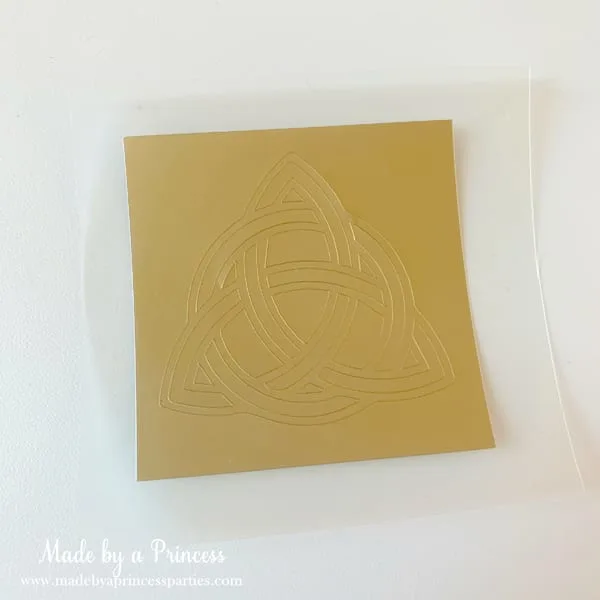
Now use your weeding tool to pull out the little pieces left behind.
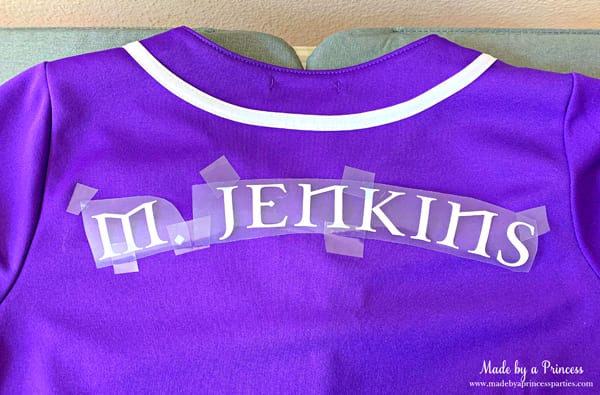
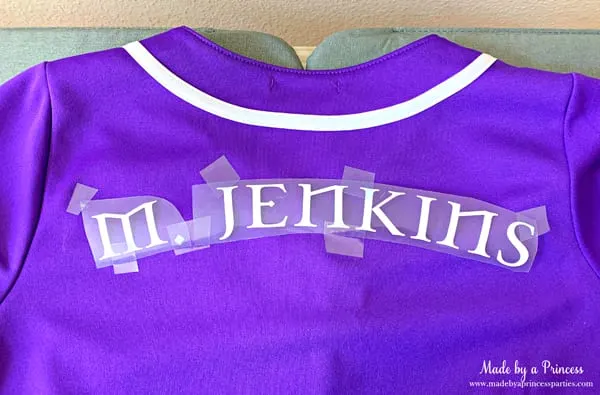
Use EasyPress 2 to Iron Decal On Baseball Jersey
If you haven’t used the Cricut EasyPress 2 you can read all about how to use it your first time. You are going to love it!
After you have cut all of your designs, use the Cricut Heat Resistant tape and place on the back of your shirt. Follow the Cricut Heat Guide (305 degrees for 30 seconds) and don’t forget to preheat your material.
Here is where I went wrong:
- The name is too low. I really wish I had moved it up. It looked fine here before I ironed it but I could see it was too low when my daughter put it on.
- I had also placed the logo on the front of the shirt to see how it looked. I forgot to remove it before ironing the back. Don’t do this. As a result the logo is slightly skewed (which bother the heck out of me!). Make sure you don’t have anything on the front when you iron the back. Lesson learned.
Isn’t this so cute though?! She loves her custom button up baseball jersey and we will never have ruined hair again!


My happy little Irish Dancer!

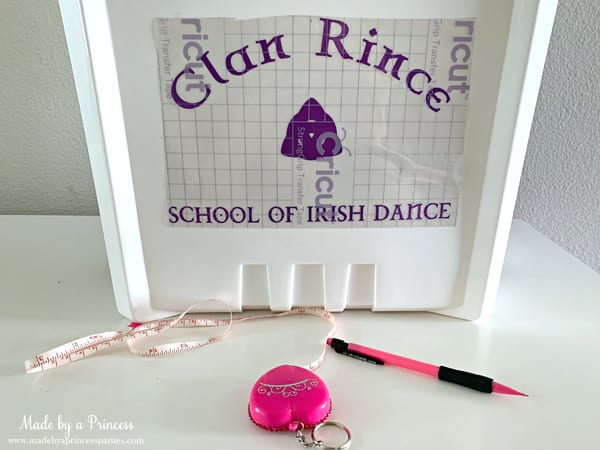
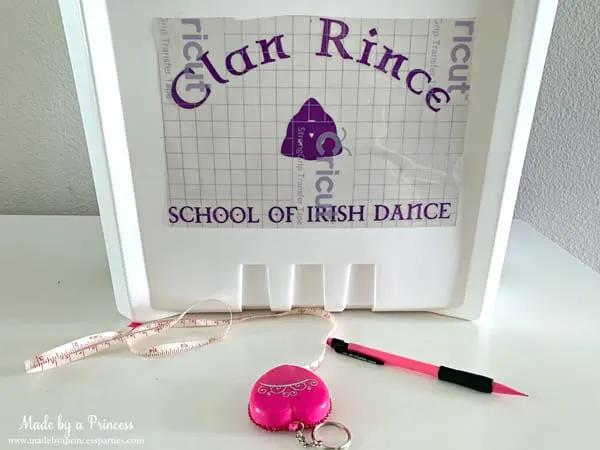
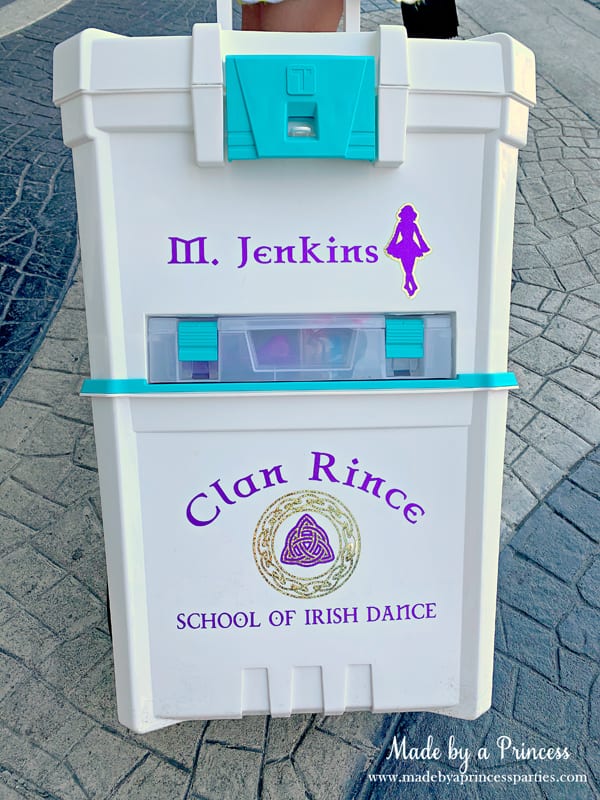
How to Personalize a Rolling Dance Organizer Cart
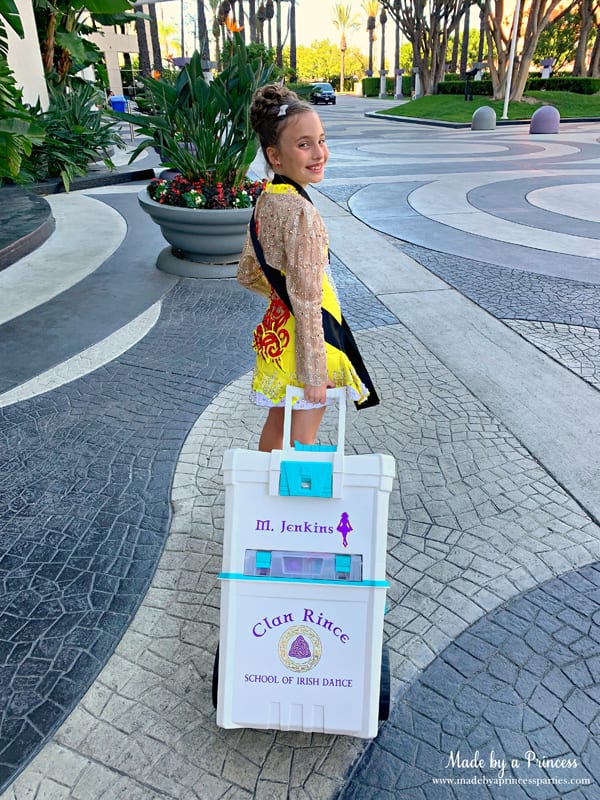
I have an extra project to share with you! I found this rolling craft cart at Michael’s this summer. It was on sale for $39 from $99. I have not seen this since and don’t know when they are going to bring them back but if you see one…grab it! I knew right away this was going to be perfect for taking all our stuff to Irish Dance competitions. There is A LOT of stuff. I think I’ll do a “What to Bring to Feis” post soon for all you first time Feis Moms out there!
![]()
![]()
I used Cricut Permanent Vinyl Shimmer in Purple and Cricut Permanent Vinyl Holographic Sparkle in Gold for this project. Turn dial to “Custom” on your Cricut Explore Air 2 and choose the appropriate material in the program from the list of choices.

Since this is not an iron on vinyl, you don’t need to mirror. Right side goes up on the mat.

Use Cricut StrongGrip Transfer Tape
After you weed out your design you need to use transfer tape. The regular Cricut Transfer Tape did not work with the Shimmer or Holographic Sparkle vinyl. You need to use StrongGrip Transfer Tape.
You can eyeball where your decal should go or you can measure it. Using a tape measure, find the middle and mark with a pencil. Now find the middle of your decal and line up the two marks. Having something off centered annoys me, even if no one else notices, so if you’re like me I highly suggest you measure.
Take your scraper and smooth it over the design back and forth until the decal adheres to your box.
Note: The Shimmer and Holographic vinyls were a little more difficult to use than I thought. You really have to push hard to get it to stick. I found that using my nail worked better. Go slowly when you pull up the transfer tape and prepare to help the vinyl along if it doesn’t pull off right away. Take your time. This is not something you want to rush, otherwise you will end up with ripped vinyl.
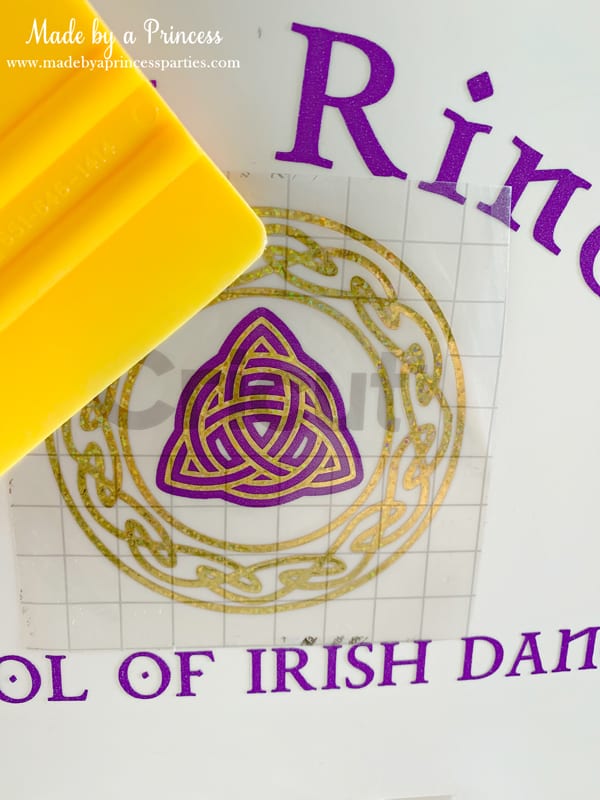
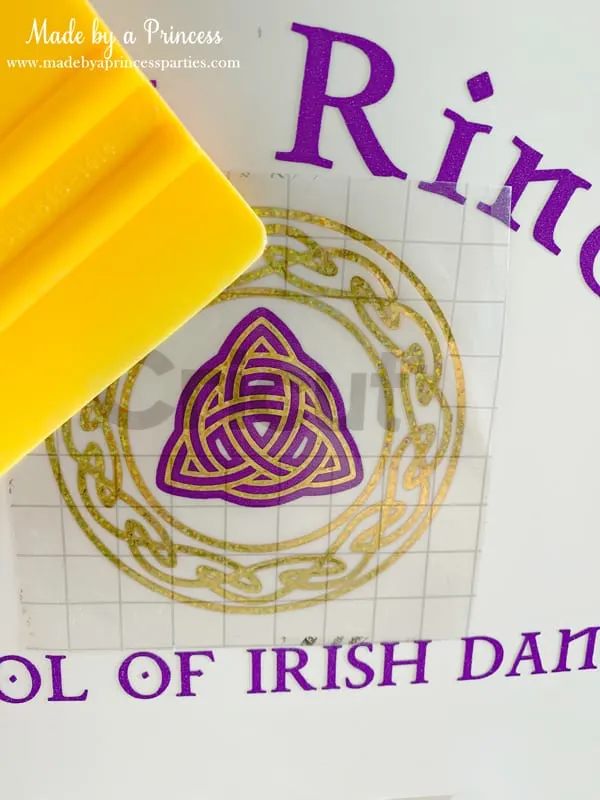
I love how sparkly the Holographic Sparkle Vinyl is!
![]()
![]()
Ta da! Our own personalized rolling makeup cart! No more carting boxes to Feis! We just roll right in and have everything we need right here in this box.


My sweet little Irish dancer! She earned the right to wear her first solo dress (aka bling dress) after only competing for six months. We are so proud of our girl!

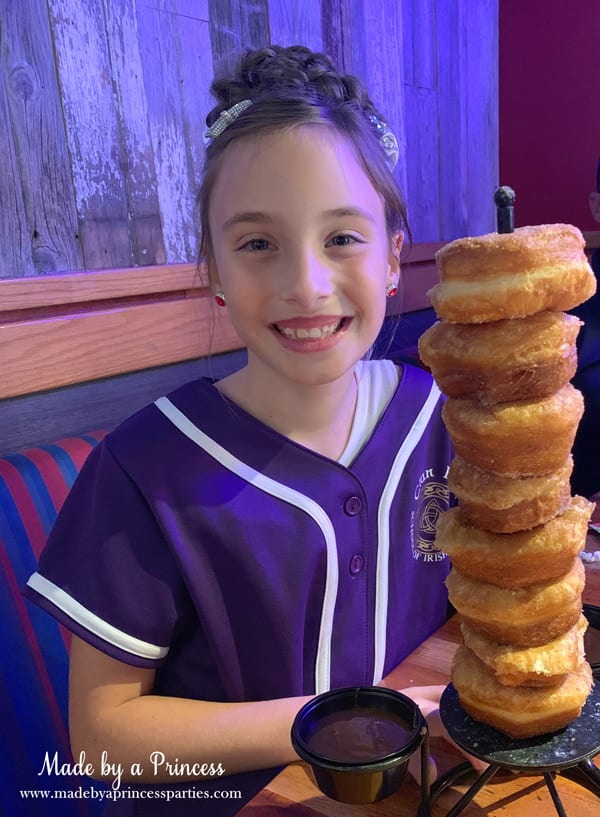
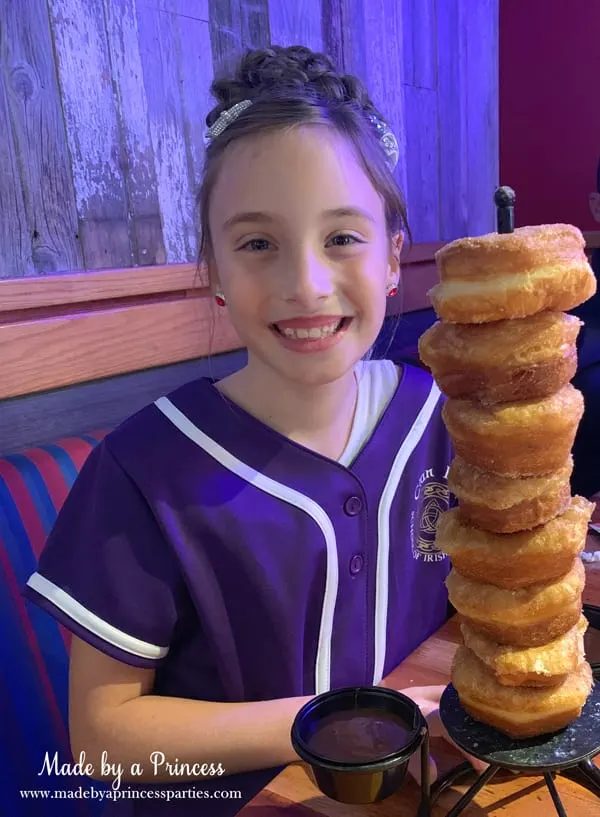
After Feis we eat. You want a tower of donuts, Baby Girl? You got it! After earning 4 medals and two trophies she earned it! (P.S. Her eyes were bigger than her stomach. She ate 1.5 and shared the rest with us and saved some for her big brother.)
I hope you enjoyed my DIY Custom Button Up Baseball Jersey and personalized makeup storage cart tutorials!
Are you a Dance Mom? Have any tips you’d like to share?!